| |
The examples shown below have been taken from Windows 7. Older versions are pretty much the same. It's not rocket science, really.
First, click the Windows button in the down left corner of the screen and chose "Control Panel". It will look like this:
Now choose "Network and Internet":
Click on "Network and Sharing Center". In the network and sharing center panel, click on "Set up a new connection or network", the link looks like this:
Choose "Connect to a workplace", even if that sounds silly (and you are probably trying to escape one), then click the Next button:
Now choose "Use my Internet connection (VPN)", because that's what we are trying to do, set up a new connection through your existing Internet connection:
In the next step, you are asked to enter an Internet address to connect to. Fill in the PPTP server of your choice. If you know the IP address or the server's name you may use this, but we suggest you use the generic by-country names we provide. In this example, we want a US based server but it could be "de" for Germany or "uk" for the United Kingdom as well. The "Destination name" is what you want to call it, it has no technical meaning.
Tick "Don't connect now" -- we need to change some parameters before the connection is finally set up. When done, click Next.
In the next step, you are asked to provide your user name and password. This is the Your Freedom user name and password, as you would use it to log on to our web page or as you would use it in the Your Freedom client software. If you want, tick "show characters" (it will make typing cryptic passwords easier and is safe as long as no-one is glancing over your shoulder) and "remember password" (safe if this is your computer and access to it is restricted). Do not put in a domain. When done, click "Create".
Windows will now tell you that the connection is ready to use, but it isn't. That's why you should click the Close button now.
In the "Network and Sharing Center" which should still be on your screen (if not, click the Windows button, "Control Panel", "Network and Sharing Center" to bring it up), click on "Change adapter settings" on the left hand side:
This will show your network adapters, both physical and virtual. The newly created "WAN Miniport" adapter should be among them (it will claim it is an IKEv2 type adapter, and that's why we need to modify it). Right-click on it and choose "Properties":
Click on the "Security" tab, then change the default settings. The type of the VPN needs to be set to "PPTP", and you should set data encryption to maximum strength encryption (though our server will negotiate that anyway). Remove the tick from "Challenge Handshake Authentication Protocol" and leave the tick on "Microsoft CHAP Version 2" -- we need to use MS-CHAPv2 instead of standard CHAP because this is a prerequisite for MPPE data encryption. The whole tab should now look like this:
Now click on the "Networking" tab and untick everything except IPv4 (it will make the VPN connection less "noisy", conserve bandwidth and slightly speed up the connection set-up). You cannot use IPv6 at this time because our servers do not support it yet:
When done, click "OK".
Now you are ready to go. There are several ways to bring up the connection. What works for everyone is this: click the Windows button, then "Control Panel", "Network and Sharing Center", "Connect to a network". (If there is a networking icon in your task bar you may simply click on it instead.) This brings up your list of available connections:
Click on the one you want, then click "connect":
Put in your password if you haven't saved it during the set-up process, then click "connect", and off you go! There will be several status messages popping up, and once they are gone you should be connected. You can verify this in your connection list (see above) -- it will now tell you that you are connected via the Your Freedom connection. To disconnect, click on the connection in the connection list and choose "disconnect" -- simple as that.
At one point, a pop-up window will ask you to set a "network location" for the new connection. We recommend that you choose "public network" to avoid unnecessary security risks:
.. you are receiving this message during the connection set-up?
It means that our server has denied your login, either because username and/or password were not correct, or your account has been disabled, or you are (as a FreeFreedom user) over the account's time budget, or there is a problem with our server. Unfortunately we cannot tell you which one of these is the reason. If the problem persists and you are sure your username and password are correct, try to log in to our web page and see if your account has been disabled. If not, check whether you are over the time budget (FreeFreedom users only -- just log in, then click on "Account"). Enabling logging won't help you at all.
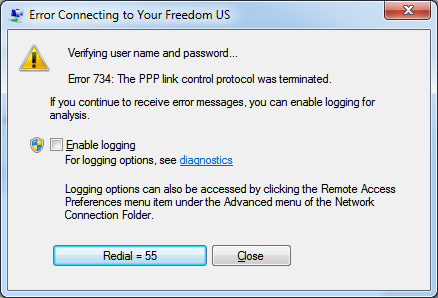
If you happen to see this during the connection:
it most likely means that our server has kicked you out. Your FreeFreedom account might be over the time budget, or your account got disabled. Try to reconnect. If that works, it was most likely some technical problem (a timeout or whatever). If problems persist, note down the exact time and contact support about it.
Yes. As with any network adapter that connects you to the Internet, you can use Windows' Internet connection sharing functionality. You'll find it in the properties of the virtual network adapter (see above). Please note that you cannot share your connection with other computers that are on the same network that you use to run the PPTP tunnel over. An example would be someone in a computer lab connected through Ethernet -- you cannot share the connection with other PCs on the same Ethernet. In order to share the connection, the other computers (Play Stations, whatever) need to be connected to an Ethernet interface that you do not use for anything else -- so put in a second Ethernet card if your computer does not have a second Ethernet interface. It is not a good idea to use the same physical infrastructure, i.e. the same Ethernet switch, since ICS runs its own DHCP service and will confuse the upstream connection.
Ours. Unless you explicitly configure your own, of course. When the PPTP connection is up, your PC will resolve DNS names through our DNS servers. We guarantee them to be uncensored.
You may configure as many as you want, but it is not recommendable to bring up more than one at a time. For example, you could define different connections for different countries. Just follow the procedure above to set up more connections. To remove them again, open the adapter panel and delete the adapter (this is where you can rename a connection, too).
If you are asking whether you and your friend can use the same account at the same time, the answer is no. Your Freedom accounts generally only work for one person at a time. If a second connection is established, the previous connection is terminated. If you are at the same place, you can share the connection as explained above, though.
|
|